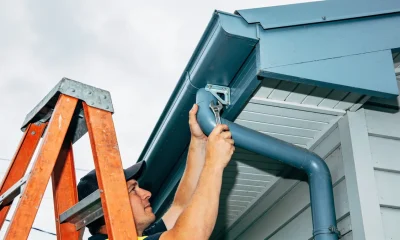
Home & Garden
Colorbond Roofing: Profiles, Colours and What Drives the Price


Drive through any street of newer houses and count the roofs. Corrugated steel, in grey and deep blue and a pale green that never quite looks the same twice, covers most of them. Forty years ago the same streets were terracotta and concrete tile. The change happened quietly, one roof at a time, and the reason is worth understanding before you spend money on the same decision.
Colorbond is a pre-painted steel roofing material, and the name belongs to the steelmaker rather than to a profile or a brand of installer. What most people mean when they say Colorbond is the combination of a light, strong sheet, a factory-applied paint system and the fact that it arrives already finished. This article covers what the material is, the profiles it comes in, how colour and coast change the choice, and where the money goes.
What the material is
Colorbond steel is a steel base with a metallic coating and a paint system applied in a factory, before the sheet is cut or bent. Because the paint is baked on under controlled conditions rather than applied on site, the finish is harder and more even than a brush or spray job can achieve, and it does not depend on the weather on the day.
That matters in Australia. The combination of sun, salt air, heat and sudden rain is hard on any surface, and the failure of a cheaper roof almost never starts with the steel itself. It starts with the coating: chalking, fading, or corrosion beginning at a cut edge or a fixing. A factory-applied finish is the reason a steel roof here can still look like a roof after twenty years rather than twenty months.
Why it suits the climate, and where it does not
Steel roofing is light, which reduces the load on the frame, and it is fixed in a way that lets the whole roof be engineered for the wind at the site. In high-wind areas that is the point: fixings and spacing are specified for the local wind rating, and a properly installed steel roof is a continuous sheet rather than a set of separate tiles that can lift.
Steel is also noisy in the rain if it is not insulated, and hot under a summer sun for the same reason. Both are solved in the ceiling rather than the roof, with sarking, insulation and ventilation, and both are worth costing at the same time as the roof itself. A new steel roof over a bare ceiling will be a better-looking disappointment than the tiles it replaced.
The three profiles you will be offered
Almost every domestic Colorbond roof is one of three shapes.
- Corrugated is the original: rounded ribs in a tight, even pattern. It is the cheapest of the three, drains well, and still reads as “old shed” to some buyers and “classic” to others.
- Trimdek has a trapezoidal rib with a wide flat pan between ribs. It looks more modern and slightly flatter than corrugated, and it is the most common choice on new houses.
- Klip-Lok is a concealed-fixed profile. The fixings are hidden under the next sheet, so the roof reads as a set of long, clean lines with no visible screws. It costs more and it is generally used on lower-pitch roofs and on designs where the roof line is meant to be seen.
The choice is partly aesthetic and partly technical, and the technical part comes first. Each profile has a minimum pitch set by the manufacturer, and a shallow roof may rule out one option or force a longer sheet so that water is not running into a join. Ask what the minimum is for the profile being quoted against your roof’s actual pitch, not against the pitch of a typical house.
Flashings, gutters and the parts nobody admires
The sheets are the easy part. The details are where roofs leak and where cheap quotes are cheap.
Ridge capping covers the top joins, barges finish the edges, valleys carry water between two roof planes, and flashings seal the roof to the walls, the chimney and the penetrations. Each is folded from the same pre-painted steel, and the quality of the folds and the number of them is a large part of the labour on any quote.
Gutters are the same story in a longer form. A Colorbond gutter is often chosen to match the roof exactly, and the standard profiles, quad and hi-front among them, are available in the same colour range. Because the gutter and the fascia are the parts you see from the ground, mismatched colour between a new roof and an existing gutter is the most common way a good roof still looks unfinished.
If the roof is sound and it is the gutters that are past their best, replacing them is a smaller job with a similar effect on how the house reads from the street, and the sequencing questions are covered in this guide to guttering upgrades worth doing before a sale.
Choosing a colour, and what the coast does to it
Colour is where the decision stops being technical and starts being permanent. Two rules are worth knowing before the sample chips come out.
The first is heat. Light colours reflect more of the sun’s energy and darker ones absorb it, which shows up in the temperature of the ceiling below. If the house has no roof insulation worth the name, colour is doing work that insulation should be doing.
The second is location. The coating warranty a manufacturer offers is not the same for every colour, and it is shorter in severe marine environments, where salt and sun are harshest. The conditions matter as much as the period, so ask what applies to the specific colour on the specific block rather than reading the headline number off a brochure. A colour that suits the street and fails its warranty in eight years is not a saving.
The practical shortcut is to stay within the standard range, because custom colours are harder to match across gutters, fascia and downpipes, and harder to replace if a sheet is damaged later.
What changes the price
Roofing quotes for the same house can differ by thousands, and the gap is rarely the material. It is usually one of the following.
- The complexity of the shape. Hips, valleys, dormers and changes of pitch mean more cuts and more flashing.
- Sheet length and joins. Long sheets that run the full slope cost more to transport and handle, and they remove joins, which is where leaks start.
- Removal and disposal. Taking off the old roof, and paying to dispose of tiles, is a real line item and should never be missing from a quote.
- Access. A tight block, a steep site or a roof that cannot be reached by truck changes the labour, and sometimes the equipment.
- Season and demand. Roofers are busier after a storm or before winter, and the quote reflects it.
Two warranties, and they are not the same one
There are two warranties on any Colorbond roof, and confusing them is how homeowners end up with nowhere to go when something goes wrong.
The first covers the steel and its coating. It comes from the manufacturer, it depends on the product, the colour and the environment, and it covers the material rather than the work. The second covers the installation. It comes from the roofing company, and it is the one that applies if a flashing leaks or a fixing is missed.
Ask for both in writing, and read the conditions attached to the first. A coating warranty usually requires the roof to be installed and maintained to the manufacturer’s specification, which means a poor installation can void the part you thought was guaranteed.
Choosing the people who install it
A roof is only as good as the crew that fixes it, and the differences between installers are visible before you sign anything. Ask how long they have worked with the product, whether the fixings and flashings come from the same manufacturer as the sheet, and whether they will put the specification in the quote rather than describing it verbally.
Then ask the two questions that separate the professionals from the optimistic. What is the wind rating for the site, and what spacing does it require? And who is responsible if the manufacturer disputes a coating claim in ten years? Someone who can answer both without ringing anyone is worth the extra quote.
Before you order
Work out the pitch and the profile first, because those are the parts you cannot change later. Choose the colour second and stay within the standard range. Get the flashings, the gutters and the removal included, in writing, and get both warranties in the same envelope. Do that, and the roof you buy is the roof you will still have in twenty years, which is the only test that matters.
Sources: Colorbond is a registered trade mark of BlueScope Steel Limited, which publishes the technical manuals and coating warranty documents for the product range; minimum roof standards, including minimum pitch and wind fixing, are set by the National Construction Code and the relevant Australian Standards applied by the installer.

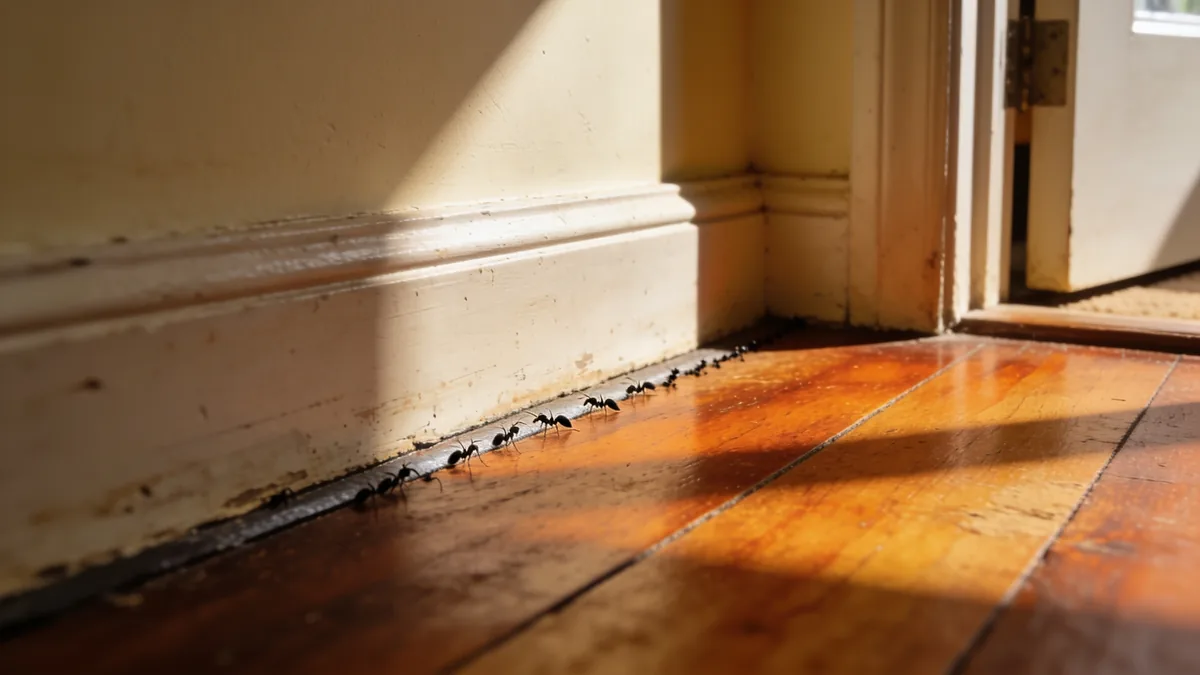
The bench is clean. You wiped it before bed and again this morning, and the bin is not full, and the dishwasher is shut. And still, there they are: a neat line of small dark ants crossing the bench like they are following a road, because they are. You sprayed a week ago, and the spray worked, and now they are back, and it is hard not to hear that as a verdict on your kitchen.
It is not. Ants in an Australian kitchen in late winter are one of the most ordinary events of a household year, and the spray failing after a week is what that kind of spray does. Nothing about the loop you are in is a hygiene problem, and the way out of it is smaller than the effort you have already spent.
What you are seeing

The line of ants is a tail, not the animal. The ants crossing your bench are a small scouting and foraging group, sent out from a colony that can be sitting metres away: in the wall behind the cupboards, under a pot on the windowsill, beneath the paving outside the back door. The colony is the thing with the appetite. The trail is just its delivery route.
This is where the loop you have been in starts. Killing the ants you can see removes foragers and changes nothing about the colony, which has replacements, and the trail reappears as soon as new scouts find it worth running. You are not losing to the ants. You are playing a game that only ever resets.
There is one more detail worth noticing, because it decides how the next fortnight should go. The trail is not random. It is a route the colony has found worth running, discovered by scouts and then reused. Killing the ants on the route does not close the route, and the colony’s response to a closed route is simply another survey. Feeding the route is the only use of it that reaches the nest.
Why the spray makes it worse
Surface sprays kill the ants they touch, and the survivors learn. Contact killers are repellent to the rest of the colony, which is part of how the product works: the treated surface becomes a barrier that ants avoid. That is useful when the goal is keeping ants out of one cupboard for an afternoon, and it is the wrong tool for the goal most people have, which is an end to the traffic.
When a barrier blocks the old route, the colony does not give up. It reroutes, which is why your spray worked for a week and then stopped: the ants are not using the door you closed anymore. Worse, in the ant species with more than one queen, a repellent can split a colony into separate satellite nests, and then you have two problems where you had one. The spray did not fail, in other words. It did what repellents do, and the result looks exactly like failure from the kitchen.
The rerouting explains the specific pattern of your week better than any theory of dirty benches could. Day one: the spray goes down, the ants vanish, and the barrier holds. Day seven: a new line appears twenty centimetres to the left, or on the bench across the room. That is not a new infestation arriving from outside. It is the same colony, having found the way around, and it will keep finding the way around for as long as the way around keeps being the easier option.
What works: the slow feed
Baits work on the opposite principle, and the difference is worth understanding once, because it reframes the whole exercise. A bait is not a poison you hope the colony walks over. It is food, laced with a slow-acting insecticide, and the design of the bait is what does the work.
Ants share food with each other. Workers carry what they find back to the nest and pass it along, mouth to mouth, in a behaviour called trophallaxis, and the food keeps moving from that first carrying ant all the way to the queen and the brood. A slow-acting bait rides the colony’s own distribution system. That is why slow is the feature rather than the flaw: a bait that killed instantly would kill the foragers at the dish and never make it home.
Household baits come in two main appetites, sweet and protein, and different species recruit to different ones. You do not have to know your ants by name to find out which. Put a small dab of each, a hand’s width apart, somewhere along the trail, and watch for two minutes. The ants will gather on one of them, and that is the one to use. It is the simplest piece of evidence you will collect all week.
There is a reason the two-minute test beats every recommendation list: different species recruit to different baits, and which species visits your kitchen is not something a product label can know. Watching for two minutes tells you more about your ants than an hour of reading ever will, and it costs one dab of bait and one moment of attention.
Then the part that asks for your patience. Place bait stations along the trail itself, not scattered around it. Let the ants find them and carry. And leave the whole thing alone for ten to fourteen days, which is how long a colony takes to distribute enough bait to collapse. The traffic may look unchanged for most of that; what moves first is everything you cannot see.
One safety note belongs here rather than in a footnote, because baits are the one part of this article that involves a pesticide. Buy registered products and follow the label, which is written for your jurisdiction and your product; store the stations away from food, and note where they are. The label is not a formality, and it was not written for the ants.
The five rules that decide it
Baiting works when five small rules are kept, and most failed attempts break one of them without noticing.
- Clean away the other food first. Pet bowls and their spill, crumbs in the toaster, the bin’s rim, a stray something behind the fruit bowl. Bait competes with every other meal in the kitchen, and the kitchen usually wins on volume.
- Do not spray anywhere near the bait. Not the trail, not the wall behind the station, not the door frame the ants are using. A repellent beside a bait cancels the bait’s whole premise.
- Keep bait away from kids and pets. Stations rather than open dabs where small hands or a dog’s nose can reach, and follow the label’s directions, which were written by people who know more about the active ingredient than any forum does.
- Mark where each station went. A small note, or a photo on your phone. In two weeks, memory will not be enough, and retrieving the stations matters if the household has pets or small children.
- Change the formulation before you change the brand. If sweet bait has done nothing after a fortnight, the answer is probably a protein bait, not a different label on the same appetite. Two products from one manufacturer that do different jobs beat two brands that do the same job.
The house half of the job
While the bait does its slow work, there is a second, gentler job on the house itself. Ants come inside for the same reasons they come onto a veranda: shelter, moisture, and a way in. Each of those has a small answer.
Walk the outside edge of the rooms where you see them and look for gaps around pipes and cables where they enter the wall, cracks along the skirting, and the soft line where a window frame meets the sill. A tube of sealant closes most of it in an afternoon. Inside, look at the potted plants near the windows and give the saucers a rinse; damp soil in a warm room is a small, dependable invitation.
One more small habit completes the house half. Where you can, follow the outdoor trail back from the house for a few metres. It usually begins at a nest entrance or a crack in the paving, and knowing which one you are looking at tells you within a minute whether this is a fortnight of patience or a conversation with someone qualified. That short walk is the most useful reconnaissance available to a household, and it costs nothing.
The damp itself is worth a thought, because it is the entry condition for the whole problem, and quiet household problems are a subject this site returns to: how to spot a gas leak before it hurts you is the same discipline applied to a different system. You are looking for the quiet condition that rewards early attention, and with ants, the quiet condition is usually a drip or a dark, humid corner somewhere along the wall.
The honest threshold
Some nests are beyond a household’s reach, and it is fairer to say so than to sell you another round of bait. A colony inside a wall cavity, or under a concrete slab, is not a problem that surface treatment solves, because the trail will simply move along the cavity and re-emerge somewhere else. The same goes for the small number of species that genuinely damage buildings rather than merely visiting them; in most Australian homes the indoor visitor is the coastal brown, a nuisance rather than a threat, but identification is a job for someone qualified to do it.
This is the one moment where a licensed pest manager is the sensible call, and it is a call about a nest’s location rather than about your competence. Professional treatment is regulated, and the products a licensed manager uses are registered for the job; that side of the subject belongs to specialist guides. The household’s threshold is simpler: if two weeks of patient baiting has changed nothing, and the trail keeps getting found, the nest is somewhere you cannot reach. That is the site’s usual rule for a house system, the same way the plumbing warning signs that mean it is time to call someone sort themselves by what can still be handled at home and what cannot.
Where the trail ends
One thing to do today, and the rest is patience: put down a sweet and a protein dab, watch which one the ants choose for two minutes, and move the chosen bait onto the trail. Then leave it alone, keep the bench its ordinary level of clean, and give the colony the fortnight it needs.
The ants you are seeing are a small animal going about an ordinary errand, and the ending to this story is dull on purpose. The traffic thins, then stops, and nothing dramatic announces it. You did not win a war; you simply stopped resetting the game and let a slow meal do what a fast spray could not.
There is nothing to feel defeated about while you wait, either. The colony is going about its errand, the bait is going about its slow work, and the household’s only job is to avoid resetting the board for ten days. That is a small thing to ask of a kitchen, and it is the whole of what the fortnight needs.
Sources: Australian Pesticides and Veterinary Medicines Authority – registered bait products and label directions; state agriculture department pest notes on household ant identification and control; CHOICE – baits and sprays guidance for household pests.


You already own everything this fix needs. The first step costs nothing, it takes no shopping trip, and it is a door left ajar.
Start there tonight. Leave the door open when the load is done, and leave it open until the drum is dry. That one habit changes the conditions the smell needs in order to grow, and it is the smallest of the changes in this article rather than the largest.
If you have already tried a cleaning cycle, a tablet or a splash of vinegar, none of that was wasted effort and none of it is being criticised here. It is the same road most people walk. The reason it has not worked is geography: the products reach the parts of the machine the water reaches, and the smell lives somewhere else.
The order of the checks matters more than the list is long. Start with the gasket and the filter, because those are the two places the smell lives most often, and stop once you have found the source. A machine rarely has five problems at once. It has one problem, showing up in five places, and the first place you find it is usually the whole of the answer.
What the smell is
The musty smell is biofilm. It is a living layer of bacteria and detergent residue, and it builds up on the surfaces your wash cycle never scrubs.
That is the difference between cleaning a machine and freshening one. A hot cycle and a cleaning product work on the parts the water moves across. Biofilm grows in the parts that stay damp and still after the cycle ends: behind the drum, inside the folds of the rubber seal, in the housing behind the detergent drawer.
It also explains why the smell comes back. You kill a layer, the conditions stay the same, and the survivors rebuild. Damp, warmth and food are all a biofilm needs, and a closed machine door supplies all three for free, every night, all year.
It helps to picture where the water rests after a cycle ends. It rests in the low fold of the door seal, in the base of the drawer housing, in the cup of the pump filter, in the low bends of the hose. Every one of those places can be reached and dried, and none of them is touched by a cycle run with the door shut and the machine left to sit. Of the places that hold water, one needs a cloth, one needs a press of a catch, one needs a towel on the floor, and two ask only for the monthly cycle. That is the whole scale of the work.
Where it hides on a front loader


Five places on a front loader carry most of the problem, and each one takes about a minute to check. Start with the most likely culprit, and stop when the smell has an explanation.
- The rubber gasket. Pull the lip of the door seal back, all the way around the drum, and look inside the fold. Water, lint and dark residue collect there, and it is where most smells live. Damp and clean is normal. Slimy or black needs a wipe, and the fold needs time open to dry.
- The drawer housing. Take the detergent drawer out, which most machines allow with a single press, and look into the space it slides out of. Residue sets hard on those surfaces. Warm water and a cloth lift it, and the drawer itself can usually go through a rinse.
- The pump filter. Behind the small flap at the base of the machine sits a filter that catches coins, hair, lint and worse. It turns by hand, and a shallow tray and a towel catch the water that comes with it. This is the check most people never do, and it is the one that most often explains a smell that survived everything else.
- The outer drum. You cannot see it, and you do not need to. It comes clear with the hot maintenance cycle described below, which is what that cycle is for. If a machine has been run cold and gentle for years, this is where the buildup sits.
- The drain hose. The other part you never see, carrying water away at the end of every cycle. A residue film inside it feeds the drain end of the problem, and the same maintenance cycle keeps it in check. A hose that has gone hard or smells at the connection point is a job for a technician, and it is a small one.
If you take one check from this list, take the filter. It is the least glamorous minute in the whole routine and the one most likely to end the mystery.
Top loaders are different
A top loader fails in the same way and hides it in different places. The principle is identical: find the damp, dark, food-rich corners and starve them. The map is shorter, though, which is one small advantage of the design.
Three spots cover most of it. Lift out the lint filter, where the machine has one, and clear what it holds. Look under the agitator cap and around the base of the agitator, where grit and residue gather. Then look into the gap between the inner tub and the outer drum for a tidemark of scum; a fouled gap is an advanced case, and the maintenance habit below, kept up over a fortnight or two, is the honest answer rather than a single dramatic fix.
One more difference between the two designs, and it is in your favour either way. A front loader seals against water with the rubber gasket, which is why it has folds for the smell to use. A top loader mostly does not, which is why its trouble collects in filters and gaps instead. Neither design is cleaner than the other. They simply keep their dirt in different places.
The five things that work
Everything that works is either a smaller change than you expect or a smaller product than the shops suggest. You can start all five this week for almost nothing, and the first two are the ones that matter most.
- Use less detergent. Start at half the cap. Modern detergents are concentrated, machines use less water than their ancestors, and undissolved detergent is the raw material of the waxy residue, called scrud, that feeds the smell. If the clothes come out clean, and they will, half a cap is enough.
- Stop the fabric softener. This is the single biggest change on the list. Liquid softener leaves a residue that the rinse cannot wash away, and that residue is what the biofilm feeds on. Your machine’s manual almost certainly advises against it, and most people are surprised when they look.
- Leave the door or lid ajar. After every load, not just the last one of the week. Air movement is the entire mechanism of this habit, and it is the one the machine cannot do for itself.
- Run a hot maintenance cycle monthly. An empty hot cycle, following whatever your manual directs for maintenance, keeps the outer drum and the hose clear. If the manual names no product, the hot empty cycle alone still does most of the work.
- Dry the gasket after the last load. A cloth around the fold takes seconds. It is the cheapest habit here and the one that pays back fastest.
There is a reason a list of small habits beats a list of strong products, and it is the same reason the site’s guide to smarter cooking with less waste works in the kitchen: systems respond to routines, and a routine a household keeps does more than a treatment applied once and forgotten.
None of the five costs money to begin, and the first two cost less than what you are using now. That is the part of the list worth sitting with. The changes that fix the smell are mostly subtractions: less soap, no softener, nothing new added to the machine at all.
The myths on page one
Three pieces of advice dominate the search results for a smelly machine, and none of them is as wrong as it is incomplete. Each one is worth understanding, because each one explains why somebody tried it and still had a smell.
Vinegar, at a sensible quantity, is a decent descaler for a drum, and it is not a cure for biofilm. The fold of the gasket, the drawer housing and the filter do not soak in a dilute acid cycle; they need to be reached by hand, with a cloth or a brush. Vinegar is also unkind to rubber over time, and the gasket is rubber, so the place that needs the most attention is the place vinegar treats worst.
Baking soda and vinegar together produce a fizz and very little else. The two neutralise each other on contact; the bubbling is chemistry doing exactly what chemistry does when an acid meets a base. It looks like cleaning, and it is a demonstration rather than a clean.
The cleaning tablet is fine as maintenance, and it is not a diagnosis. Tablets work on the drum and the parts water reaches, which is most of what you can see and not much of what you cannot. If the smell survives a tablet, the answer is not a second tablet. It is the map above, worked through in order, starting with the gasket and the filter.
One honest word about descaling products, because they are sold as fixes for this problem and they are nothing of the kind. A descaler has a real job in a hard-water household, and the job is the inside of the drum and the elements around it, where mineral scale builds. It is not a treatment for a gasket fold or a pump filter, because it never reaches them. Use it for what it does well, and let the cloth and the brush handle the rest.
When it is not the machine
Two smells get confused with each other, and they point in different directions. Telling them apart saves money before it saves effort.
A drum smell is musty and close, and it greets you when you open the door. That is the biofilm problem this article is about. A drain smell is sharper, closer to a sink, and it arrives when the machine drains. That one usually comes from the drain or the hose connection rather than the drum, and no amount of internal cleaning will touch it. If the smell appears at the drain end of the cycle, a technician is the cheaper answer than another round of products.
One spare part is worth knowing about, because it changes the arithmetic on an older machine. The door gasket on a front loader is a replaceable part. If the seal is cracked, hard or permanently black, replacing it is a smaller job than replacing the machine, and it restores the one surface the smell likes best.
The dividing line between the two smells fits in one sentence. If the smell arrives with a cycle, suspect the drain. If it greets you when you open the door, suspect the machine. Everything in this article lives on the second side of that line, and the first side belongs to a different trade.
The five-minute reset
The honest ceiling belongs here, because it is kinder to say it than to let a routine promise more than it can deliver. A machine that has smelled for years may not come all the way back. What you can do before spending anything on a replacement is the list above, given a fortnight and one honest look at the filter.
If it still smells after that, the machine has told you something, and the habits you built while checking will keep the next one out of the same trouble from its first week. Door open at the end of the load. Half a cap of soap. No softener. The reset genuinely is five minutes, and you have already read most of it.
And if the machine is replaced after all, start the new one the way you would have ended the old one. Soap at half. No softener. The door open at the end of every load. The new machine deserves the habits the old one taught you, and they cost nothing to carry across.
Sources: CHOICE – washing machine cleaning and maintenance guidance; ABC News – cleaning habits that extend a washing machine’s life (2024); manufacturer care manuals for front load and top load machines.


An electric blanket costs about 4 cents an hour to run. A small space heater costs roughly 15. For the price of one hour of heating a room, you can run the blanket for most of the night, and that is the whole case for the appliance in two numbers.
The second half of the case is the one the retailers skip. A blanket is an electrical appliance, it ages, and fire services record more than 100 fires a year that begin with one. Cheap and safe can both be true at once. The checks in this article are what keep them true.
The cheapest warm in the house
Winter heating numbers are usually depressing, so here are the good ones. Energy Australia’s published guidance puts an electric blanket at about 4 cents an hour, against roughly 15 cents an hour for a small space heater. CHOICE tested blankets across a full season and recorded $11 to $23 for a whole winter on a 92-day season. A single blanket, including nightly pre-heating, came in at about $20 for the season. Even the heaviest pattern tested, one blanket run on low for eight hours a day all winter, topped out around $50.
Those figures are not nothing. Set them against anything else in the house that makes heat, though, and the gap is wide. A blanket warms a person. A heater warms a room, which includes all the air you are not in, the ceiling, and the gap under the door. The blanket is cheap because the job it does is small, and the small job is the one you wanted.
The comparison that decides most household arguments is not blanket against blanket. It is the blanket against whatever else was going to run all evening: the column heater, the panel heater, the reverse-cycle left on for the whole room. Heating one person under a doona is the cheapest version of staying warm that a house contains, and the blanket is the most direct way to do it.
The honest catch is durability. Cheap blankets die young, and a blanket measured in seasons rather than winters stops being a bargain the year it quits. Buy one worth keeping, look after it, and the arithmetic above keeps working for a decade.
That durability point deserves one more line, because it decides the real number. The season figures assume a blanket that works. A blanket that lasts three winters costs a third of its purchase price per winter, and one that lasts ten divides it by ten. The storage habits further down are what make the difference, and they cost nothing but attention.
Do the maths for your own blanket
Three numbers decide your cost: the blanket’s wattage, the hours it runs, and the rate on your electricity bill. The formula is watts multiplied by hours, divided by 1,000, multiplied by the tariff per kilowatt hour. Worked once, at a 60-watt draw and a tariff around 31 cents, it looks like this.
Your tariff is the figure most people guess at rather than read. It is printed on the bill in cents per kilowatt hour, and it is worth finding once, because tariffs differ enough between households to move this sum without the blanket changing at all.
| Your number | Where to find it | Worked example |
|---|---|---|
| Power draw | The label on the blanket | 60 watts |
| Hours a night | Your routine | 8 hours |
| Tariff | Your electricity bill, per kilowatt hour | About 31 cents |
| Cost | Watts multiplied by hours, divided by 1,000, multiplied by the tariff | About 15 cents |
Eight hours at that draw comes to about 15 cents a night. Pre-heat and switch off, and it is smaller again. Either way, the amounts that land on your bill are counted in cents, which is why a blanket is hard to spot on a smart meter at all.
One habit shrinks the number and improves the safety at the same time: a timer, or a pre-heat and switch off. Half an hour of warmth before bed does most of what eight hours of running does for comfort, and it removes the overnight question entirely.
One honest note about the table before moving on. It treats the blanket as running at its stated draw for the whole time, which is the worst case. A blanket on a lower setting draws less, and a timer cuts the hours without touching the wattage. Every version of the arithmetic still lands in cents.
What the fire service says
This is the part worth reading twice. Fire and Rescue NSW records electric blankets as the source of more than 100 fires each year, and its guidance is direct: do not leave a blanket running overnight, and do not leave one on while you are out of the house. The recommended pattern is warm the bed, then switch it off at the wall.
The causes are the ordinary ones. A frayed cord running under a mattress. A controller that has run hot for months. A blanket old enough that its internal elements have stiffened and cracked. None of those failures look dramatic before the night they matter, which is the whole problem with a device that lives out of sight.
None of them arrives without a sign, either. A frayed cord shows its fraying, and a controller that runs hot has been running hot for a while. The checks below exist because those warnings are visible in advance, and a dark bedroom at midnight is the worst possible place to meet one for the first time.
There is a tension in the advice, and it deserves to be stated instead of hidden. Modern blankets are tested to a standard, and some manufacturers do allow overnight use in their instructions. Fire services say no anyway. This article sides with the fire service, on the simple grounds that the blanket is under your bedding, switched on while you sleep, and nobody is watching it.
The advice reads strict because of the setting rather than the appliance. A blanket spends its working life under bedding, inches from a sleeping person, in a room where nobody is awake to notice a smell of burning. Everything else in the house that makes heat is either watched or switched off. The blanket asks for a rule of its own for exactly that reason.
The five-point check before winter
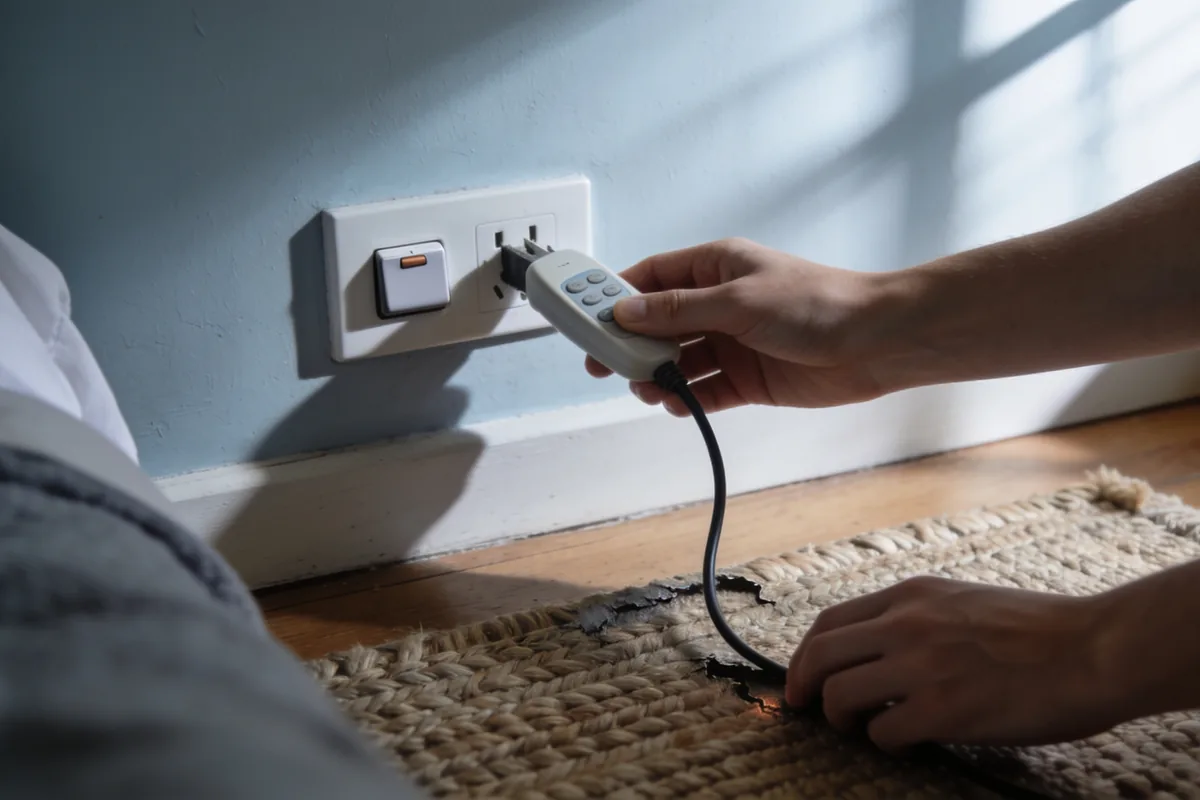
Run the blanket through five checks before its first cold night of the year. Each takes a minute. Any failure takes the blanket out of service, and there is no argument to have about it. Do it on a bright morning, with the blanket flat and unplugged, before the weather forces the question. The point is not to hunt for faults; it is to catch the changes that come before one, and those changes show themselves in daylight far more readily than in a dark bedroom at midnight.
- The cord. Unplug it and run the full length through your hands, flexing gently as you go. Fraying, kinks that stay kinked, or any exposed wire ends the conversation. A cord pinched under a mattress frame is the classic case.
- The plug and the socket. Look for browning or scorch marks on the plug and around the socket it lives in. Warm is normal on a busy circuit. Hot is not.
- The controller. Check that it switches cleanly between settings and off. A controller that runs hot, buzzes, or has a cracked case is a fault, not a quirk.
- The fabric. Lay the blanket flat in daylight and look for scorch marks, hot spots, and patches that have gone stiff or brittle. These are the late warnings, and they are the ones people find after the fire.
- The mark and the age. Look for the regulatory compliance mark and the standard AS/NZS 60335.2.17 on the label. Then think about age. Replace a blanket older than about 10 years, and treat a second-hand blanket as a no.
This is the same logic the site applies to a house’s pipes and wiring, and it is why the plumbing warning signs worth acting on are sorted by urgency rather than by drama. The early signal is the cheap moment to act.
A second check belongs in the same week of the year. The signs a gas leak gives before it hurts anyone are the same lesson in a different system: household appliances fail quietly, and the quiet is the danger.
Storing it is half the job
Most blanket faults are born in summer. Folded tightly around the same creases for months, the fine heating elements inside crack, and nothing announces the damage until the next winter, when one section of the bed stays cold or the controller starts running warm.
Roll it instead. Loosely, along its own length, in a dry cupboard, with nothing heavy resting on top. That one habit adds years to the blanket’s working life and costs nothing to start.
Dust and damp do the quiet damage. Keep the rolled blanket in a linen cupboard or its own box rather than a garage shelf where the seasons get to it, and bring it out in autumn rather than on the first freezing night, when you will be tempted to use it in whatever condition it is in.
Washing runs on the label’s terms, not yours. Most modern blankets can go through a gentle machine cycle, but only when the care label says so and only with the controller detached. Dry it flat, and dry it completely. A blanket that goes into storage even slightly damp comes out with a smell and a question mark over it.
Storage is also where people pass on a blanket they should retire. A blanket that fails one of the checks above does not become someone else’s bargain, and the ten-year rule does not care whether the blanket was expensive, a gift, or a find. A scorch mark, a brittle patch, or a cord fault means it leaves the house finished.
What the meter says
The meter says the blanket is the cheapest way to stay warm through an Australian winter, and nothing in this article changes that. The checks are not there to put you off the appliance. They are there because the same small draw that makes the blanket a bargain sits inside a device that ages in silence.
The savings are real, and so is the ten-year clock inside the appliance that earns them. Run the numbers, run the checks, warm the bed and switch it off. That is the whole method, and it holds for every winter the blanket has left.
One last thing belongs in the drawer with the blanket: a note of the year it arrived, and the receipt if you still have it. The ten-year clock is easier to obey when you know when it started.
Sources: Energy Australia – electric blanket running costs; CHOICE – electric blanket testing and running costs; Fire and Rescue NSW – winter fire safety and electric blanket warnings; Electrical Equipment Safety System – electrical compliance and recalls.


 Healthcare1 year ago
SIL Providers: What to Compare Before You Commit
- Healthcare1 year ago
What Is Physiotherapy?
- Healthcare1 year ago
What a Dental Implant Replacement Costs in Melbourne
- Healthcare1 year ago
What Changes When You Start SIL
- Food1 year ago
Budget Bites: Delicious Meals You Can Cook for Under $10
- Tech1 year ago
Mental Health Apps and Wearables: What to Trust
- Home & Garden1 year ago
Gutter Upgrades Worth Doing Before You Sell
- Healthcare1 year ago
How to Put NDIS Community Participation Funding to Work